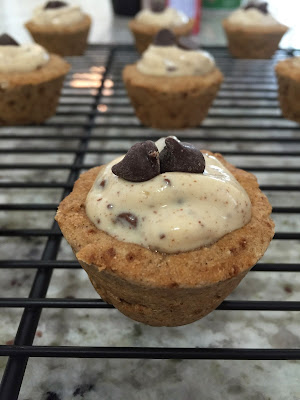
Gluten Free Cannoli Cups
After our amazing Valentine's Day dinner, I had a lot of leftover ricotta cheese. Naturally, I began searching for new recipes to test out utilizing this ingredient - And some of the first recipes I found were for cannoli. To be honest, I have only had a true cannoli a few times in my whole life. Regardless, I know how delicious these Italian desserts are so I decided to use my snow day from work to bake an easier version of the traditional cannoli. Instead of trying to fry my own cannoli shells, I turned this dessert into bite size cups filled with delectable ricotta cream.
When I made these this morning, I ended up making 2 batches of the crusts because I had SO much extra ricotta cream filling. To make things easier for you I doubled the original recipe so you should have a much more even proportion of filling to crusts, with an extra couple spoonfuls to enjoy yourself.
Ingredients


When I made these this morning, I ended up making 2 batches of the crusts because I had SO much extra ricotta cream filling. To make things easier for you I doubled the original recipe so you should have a much more even proportion of filling to crusts, with an extra couple spoonfuls to enjoy yourself.

Gluten Free Cannoli Cups
Adapted from The Low Carb Diet
Yield: 36 bite-size cups
Yield: 36 bite-size cups
For the crusts**
- 4 cups almond flour
- 1/2 cup coconut flour
- 2 teaspoons cinnamon
- 2 teaspoons unsweetened cocoa powder
- 1/2 cup pure maple syrup
- 1 cup almond milk
- 1/2 cup coconut oil, melted
- 2 eggs (or egg substitute - I used 2 Neat Eggs)
- Semisweet chocolate chips, for garnishing
For the filling
- 1 1/4 cups ricotta cheese (preferably whole milk and grassfed)
- 1/2 teaspoon almond extract
- 1/2 teaspoon pure vanilla extract
- 2 Tablespoons semisweet chocolate chips
- 1/4 cup coconut nectar (or pure maple syrup)
Directions
- Preheat the oven to 350°F (use the convection setting on your oven if you have that option).
- In a large bowl, mix together all crust ingredients until thoroughly combined. The mixture should be thick and doughy.
- Grease the tins of two mini muffin pans with coconut oil.
- Press enough dough into each muffin tin to almost fill the tin to the top. Use your fingers to make a large indent in the middle, forming a cup shape. *Note: You can make the crusts as thick or thin as you prefer, but if you want to make them much thinner than the picture below reduce the baking time by a few minutes and check on them often to ensure they do not burn.
- If desired, drop 2 chocolate chips into each cup before baking.
- Bake the crusts for 15-18 minutes, or until the edges begin to turn golden brown.
- Remove from the oven and place crusts on a rack to cool completely before filling with the ricotta cream.
- To make the ricotta cream, place all ingredients for the filling in a food processor or blender and blend until the ricotta becomes creamy and the chocolate chips have been processed into small pieces.
- Place the ricotta cream filling in the fridge until the crusts have cooled completely.
- Once cooled, pipe the ricotta cream filling into each cup and top with 2 chocolate chips.*
*If you do not have a tool for piping, you can make your own by slightly cutting off the corner of a sandwich sized ziploc bag and filling with the cream mixture to pipe.
**For a nut-free version, simply replace the almond and coconut flours with 4 cups of all-purpose gluten free flour blend, such as Bob's Red Mill
Comments
Post a Comment